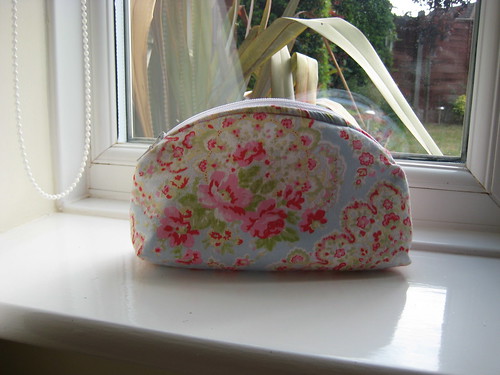
Hi all!
I'm Fiona and I have fairly recently started blogging over at Diary of a Chain Stitcher. I never got round to posting about my Christmas Crafting Plans (it's taking me a while to get into the swing of blogging all that regularly especially amongst all the Christmas chaos) but I have been determined to post about what I've been up to!
As I haven't long been crafting I knew attempting to hand make too many of my presents was just going to be pushing myself a little too far and would only result in a horribly stroppy me for the last few days before Christmas which no one would appreciate. So instead I've done a combination of handmade, produced with a lot of thought but not completely made by my hand and shop bought presents. As much as I'd like to give everyone handmade gifts I one don't have enough time and know that my handmade taste is not necessarily everyone's cup of tea.
My main made project was my Stepdad's iPad case (from this tutorial) with fun chemistry related lining! (He works in a lab) I love it because it looks very professional on the outside so he can take it to meetings but inside it's fun and colourful. I got the lining fabric from Spoonflower which I have only just discovered and highly recommend. There are hundreds of prints to choose from, and if you can't find what you want you can get your own design printed up.
I've also made my boyfriend some boxer shorts using a free pattern from BurdaStyle. They were really quick and fun to make so I think he'll be getting some more of those for his birthday! I don't have a picture unfortunately as I wrapped them as soon as I finished to avoid any accidental discoveries. The surprise is one of the best bits of a gift I think!
One of the gifts I'm most proud of is a cookbook I put together for my Mum and Nan filled with our favourite family recipes. It was a big and time consuming job but I really enjoyed it and it was very straightforward to do using the software on Blurb. They have lots of page templates to choose from which you just fill with the photographs and writing you want, press publish and they'll print up as many copies as you want, and speedily too.
I've made the majority of my Christmas Cards by cross stitching festive designs, which I also sell on Etsy. I can't stand how much printed mass produced cards cost in the shops and would much rather make my own which can be tailored to the recipient and the effort is always appreciated much more.
I've made a few Christmas decorations this year too including crackers, a table runner and these stockings:
Finally I've been doing A LOT of baking including some little Christmas boxes of shortbread for family friends who always send me a little something and who I never know what to give. A little discovery for everyone - shortbread holds up very well in the post! And this recipe for orange pastry is a winner!
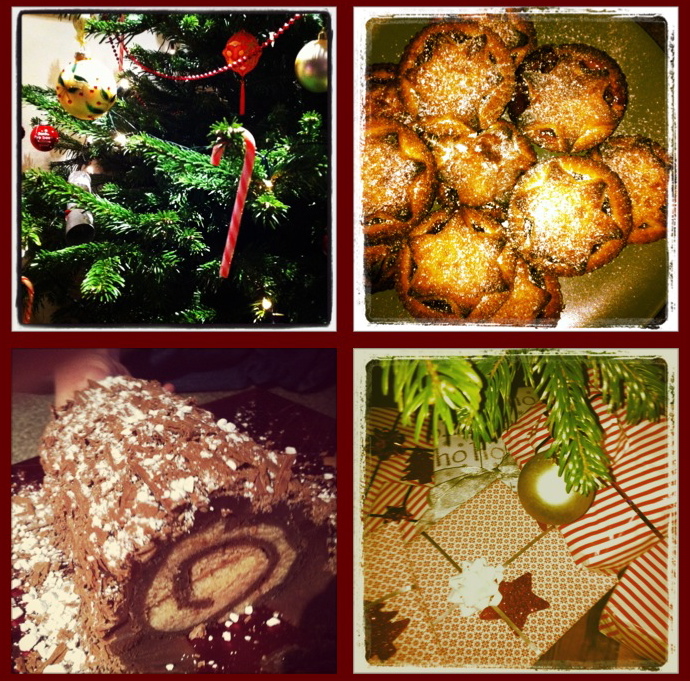
Ooof writing this post has made me realise I'd actually done a lot more than I thought! Good luck with the last minute crafting everyone! Merry Christmas!
Showing posts with label crafting. Show all posts
Wednesday, December 21, 2011
Tuesday, December 20, 2011
Embroidered Jam Pot Covers...
Back in the Autumn I made a couple of varieties of chutney as Christmas gifts. Spiced Marrow Chutney and a Tangy Beetroot Chutney using a combination of recipe ideas from this brilliant site. They've been "maturing" since October so should be perfect for the Christmas table by now. The only thing left to do was make them look all Christmassy and add a little personal touch to them; so I opted for some hand embroidered jam pot covers tied with grosgrain ribbon....(I actually had about 12 jars in total but some had already been gifted before I had a chance to take these photos!)
I got all OCD on getting the right size circle for my covers. Just didn't like the idea of cutting a square and trimming it to size once in place. I just KNEW I would screw it up that way. So if anyone else is as mildly obsessive about these things as me here's my method...
I had several sizes of jar so just repeated the process for each different size. Firstly draw round the the lid of the jar on a sheet of paper...
Then find the centre point of the circle by folding it in half lengthwise then across the width. It's actually the circle itself that needs to be folded in half so I held the paper up to the light as I was folding so as to see through it and line the edges of the circle up as I was folding...
Measure the diameter of the circle, let's say this one was 3". Then mark a point the exact same distance, 3", from the centre point, extending out beyond your original circle, on each of the four fold lines...
Then find a plate/bowl/object (or use a compass if you want to be super precise!) and use it to draw a circle that encompasses these four points equally(ish)...
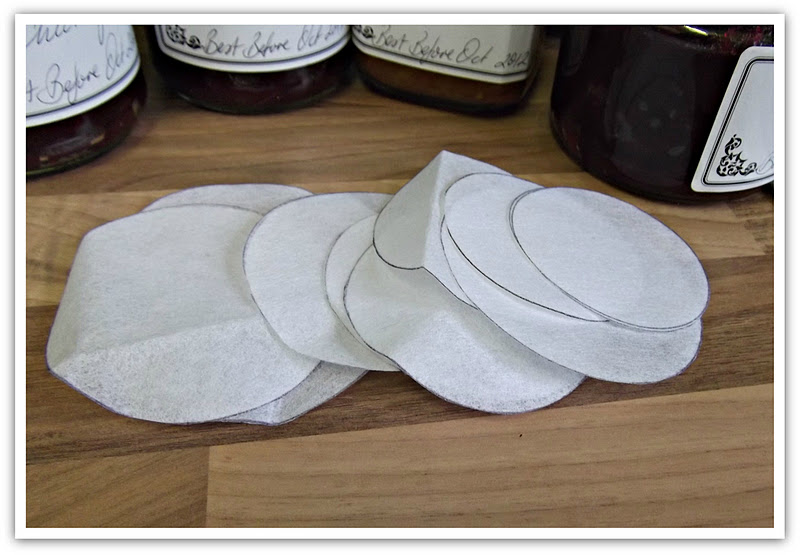
Et voila...Cut out your template(s)....
Because I planned to emroider my covers I cut out heavy weight iron on interfacing the exact same size as my jar lids....
And some squares of fabric (thrifted and upcycled of course!) slightly larger than my templates.....
Place fabric square RS down on the ironing board. Centre the interfacing sticky side down on top of the fabric and press to adhere. Then pin the template on top of this making sure the centre circle of the template lines up with the circle of interfacing....
Cut around the template with pinking shears...
It should look like this...
I then embroidered snowflakes on each cover with embroidery floss. These are a combination of French Knots, Lazy Daisy Stitch, and Back Stitch and took about 15 mins each to do so great as a last minute personal touch...
Secure the covers to the jar tops with elastic bands then tie with ribbon......
There are so many ideas out there for "Gifts in a Jar" and these would add a nice finishing touch to anything in a jar. Not just chutneys :)
Px
I got all OCD on getting the right size circle for my covers. Just didn't like the idea of cutting a square and trimming it to size once in place. I just KNEW I would screw it up that way. So if anyone else is as mildly obsessive about these things as me here's my method...
I had several sizes of jar so just repeated the process for each different size. Firstly draw round the the lid of the jar on a sheet of paper...
Then find the centre point of the circle by folding it in half lengthwise then across the width. It's actually the circle itself that needs to be folded in half so I held the paper up to the light as I was folding so as to see through it and line the edges of the circle up as I was folding...
Measure the diameter of the circle, let's say this one was 3". Then mark a point the exact same distance, 3", from the centre point, extending out beyond your original circle, on each of the four fold lines...
Then find a plate/bowl/object (or use a compass if you want to be super precise!) and use it to draw a circle that encompasses these four points equally(ish)...
Et voila...Cut out your template(s)....
Because I planned to emroider my covers I cut out heavy weight iron on interfacing the exact same size as my jar lids....
And some squares of fabric (thrifted and upcycled of course!) slightly larger than my templates.....
Place fabric square RS down on the ironing board. Centre the interfacing sticky side down on top of the fabric and press to adhere. Then pin the template on top of this making sure the centre circle of the template lines up with the circle of interfacing....
Cut around the template with pinking shears...
It should look like this...
I then embroidered snowflakes on each cover with embroidery floss. These are a combination of French Knots, Lazy Daisy Stitch, and Back Stitch and took about 15 mins each to do so great as a last minute personal touch...
Secure the covers to the jar tops with elastic bands then tie with ribbon......
There are so many ideas out there for "Gifts in a Jar" and these would add a nice finishing touch to anything in a jar. Not just chutneys :)
Px
Friday, November 4, 2011
Crochet hook tutorial
Hello, it's Wendy from The Crafter's Apprentice again. Are you ready for another tutorial? This crochet hook case is a perfect companion to the knitting needle roll I published a tutorial for a couple of weeks ago.
I'm using the same fabrics as they are both destined as a birthday present for my mum.
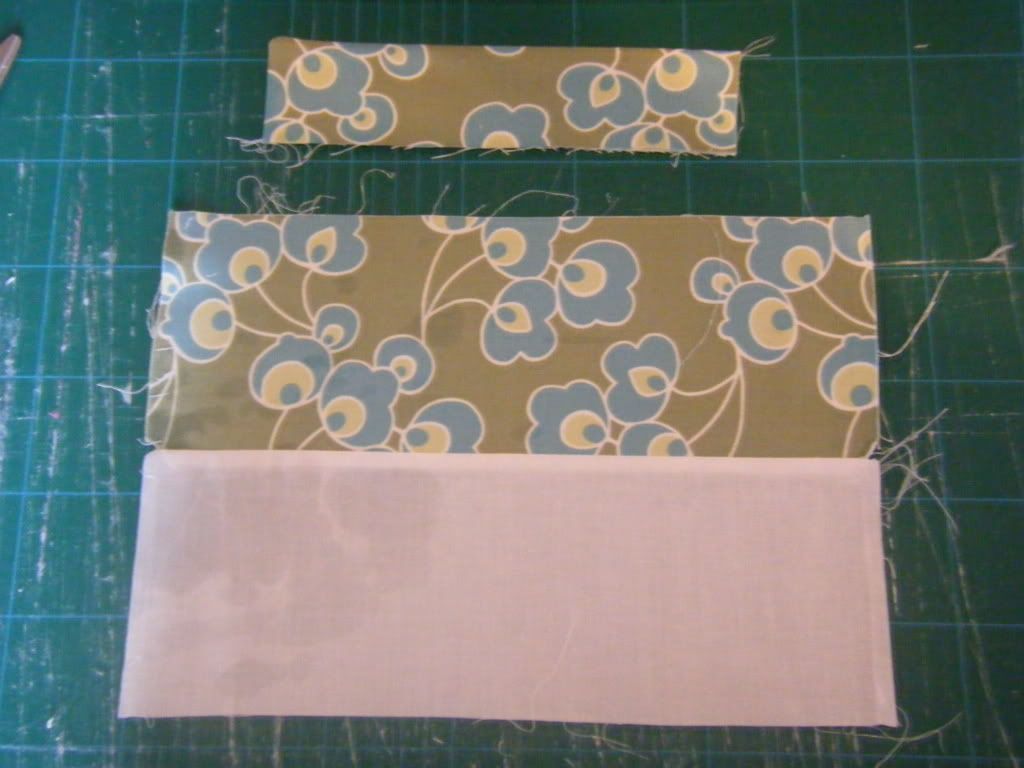
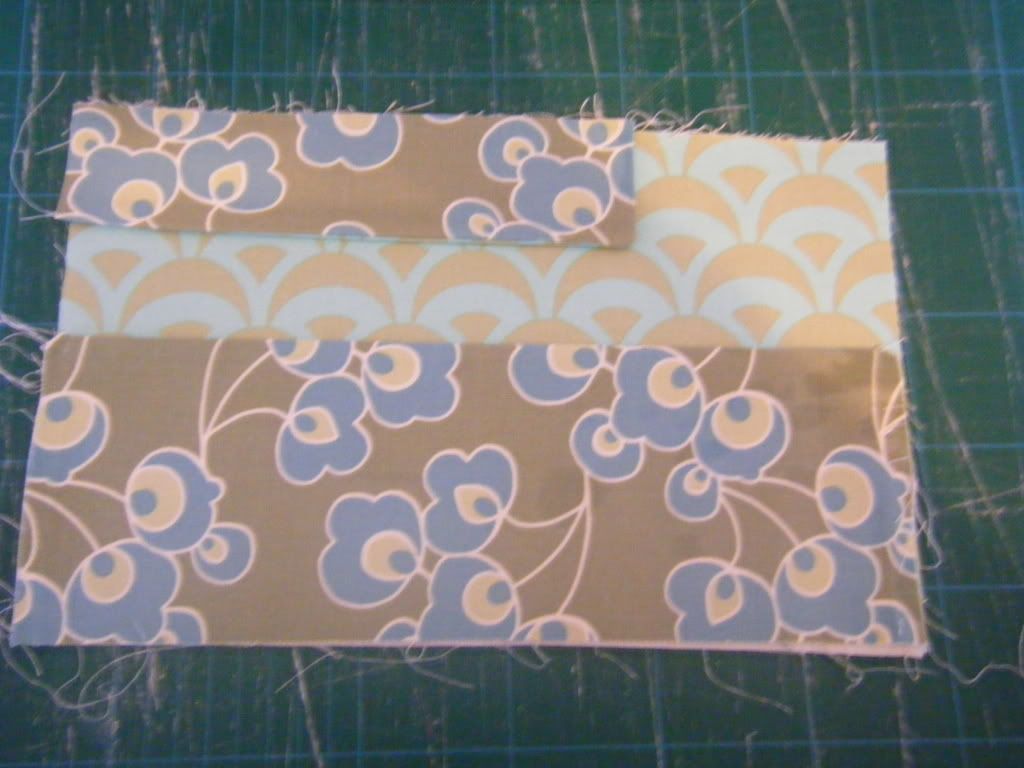
Place your pocket pieces and your flap pieces right sides together and pin.
For the pocket, sew one long edge only, flip so the fabrics are right sides out, press, topstitch if you want to. I didn't. Because I forgot, not for any scientific or design reason!
For the flap stitch one long edge and one short edge, depending on whether you want the flap on the left (like mine) or the right (not like mine). The short edge that you sew up will be facing into the middle of the roll, not the edge. Again flip, press, topstitch (or not).
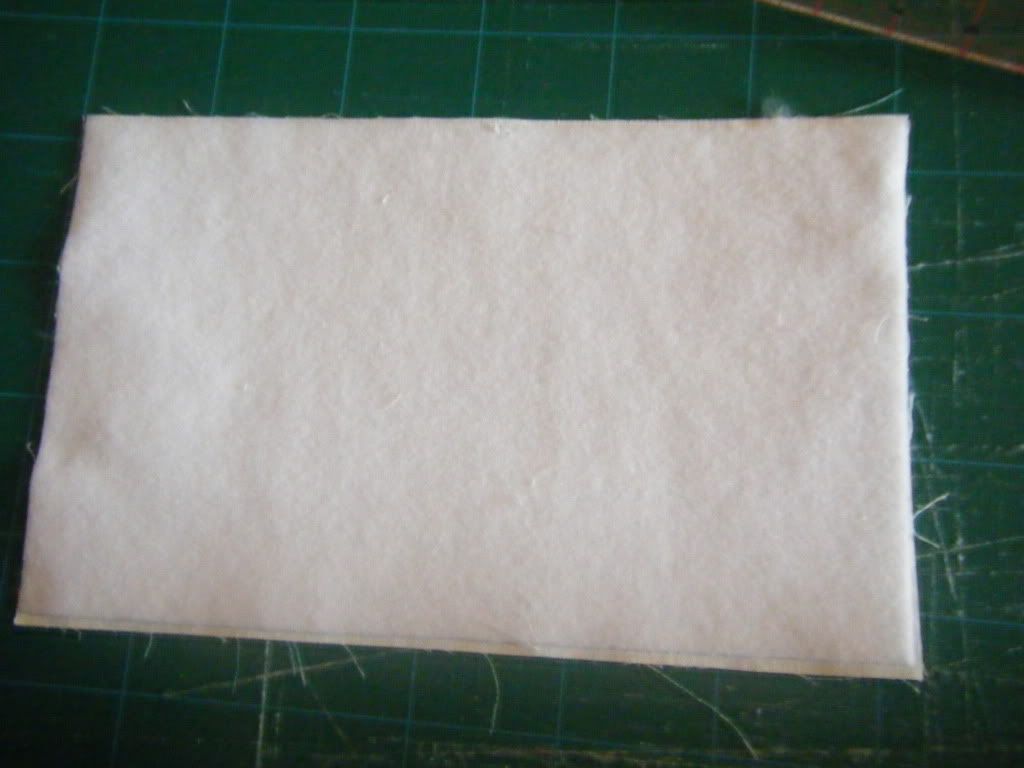
I cut my fusible fleece a quarter of an inch smaller all round than the outer piece. This just makes it easier to fuse in place without making a mess of your ironing board, iron or pressing cloth. As it's only an 1/8 inch smaller along each edge it will still be caught in the seam allowance in case it becomes unstuck later. I have had that happen to me, usually when I'm doing lots of turning, turning, unpicking, resewing, turning, turning, unpicking etc. Fuse the fleece to your outer piece.
Place your outer piece right-side-up on a flat surface, put the pocket, also right side up on top, lining up the bottom and side raw edges. Add the flap to the top corner with the two raw edges lined up with the left edge and the top edge.
Place your outer piece on top, right side down. Fold your ribbon/braid/string/lock of hair in half and tuck inside your sandwich. It needs to be loop-face inwards, raw edges sticking out about half an inch. I positioned mine just above the pocket.
Pin the whole heap together.
Sew all the way round, leaving a 4 inch turning gap along one edge. I would recommend doing this where there is only 2 layers of fabric - so on the upper edge towards the right, next to your flap.
Clip your corners, turn the whole thing inside out, making sure your pocket is on the inside and not the outside (cue loads of confusion as I can't figure out why my pocket is facing the wrong way... then realise you just need to turn it!), press the seams and top stitch if you want. I didn't, not because I forgot this time but because the seams were so bulky that I would have made a right mess of it.
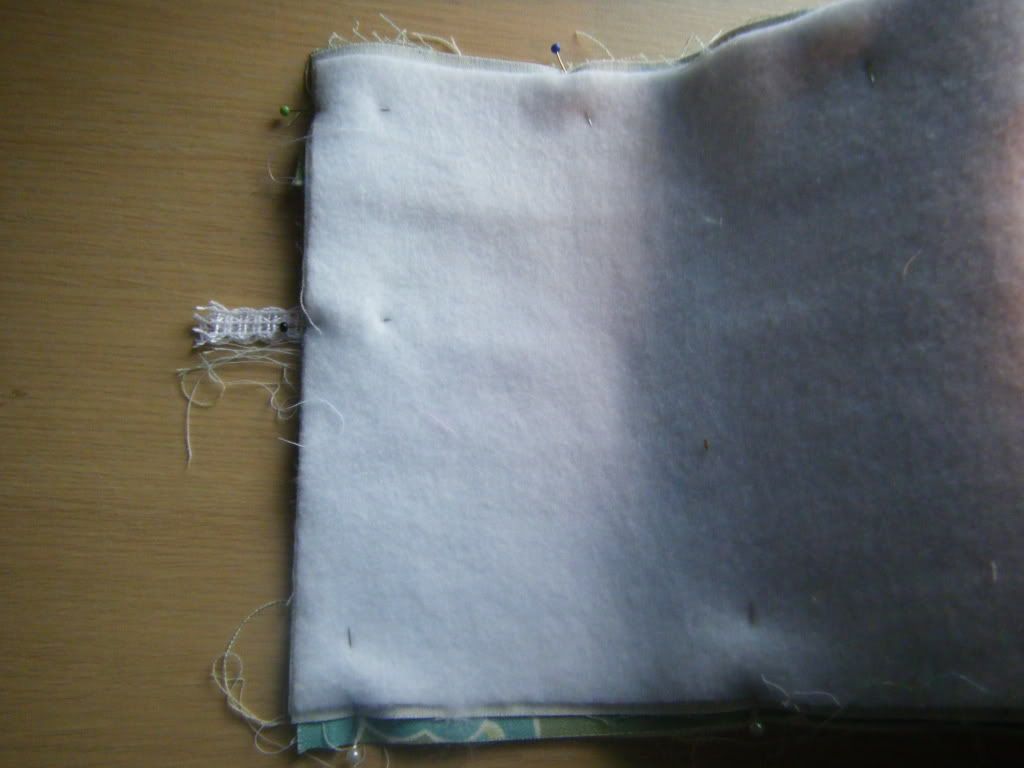
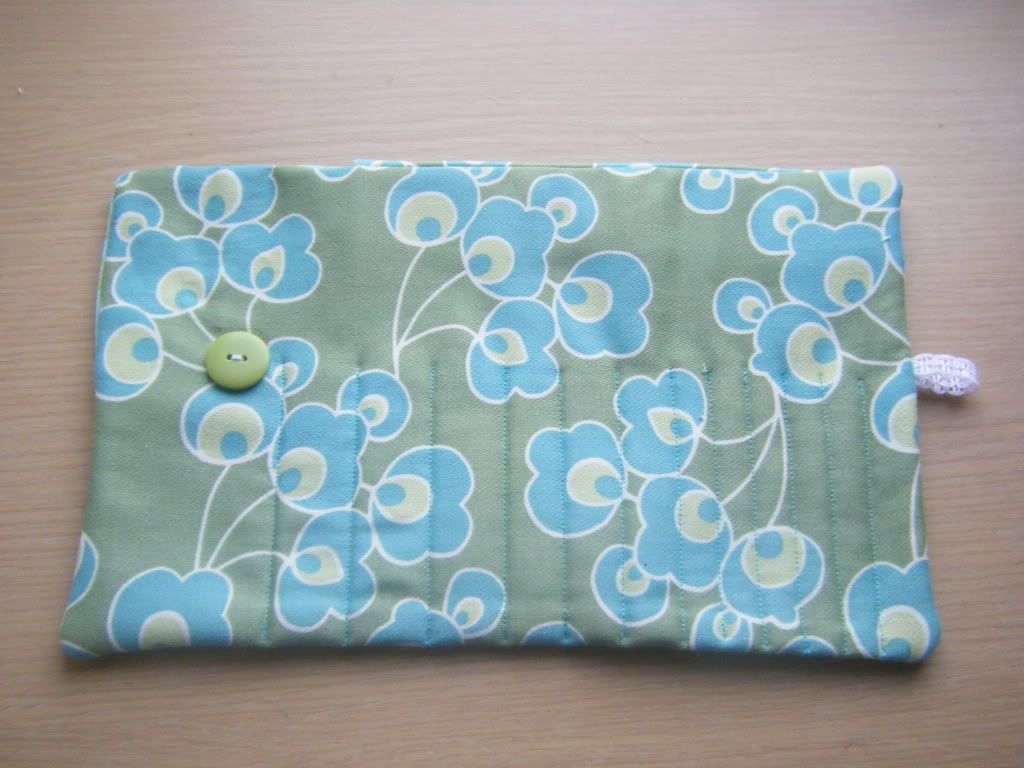
Slip stitch or ladder stitch your opening closed. For some reason I thought you might like to see a picture of the back at this stage.
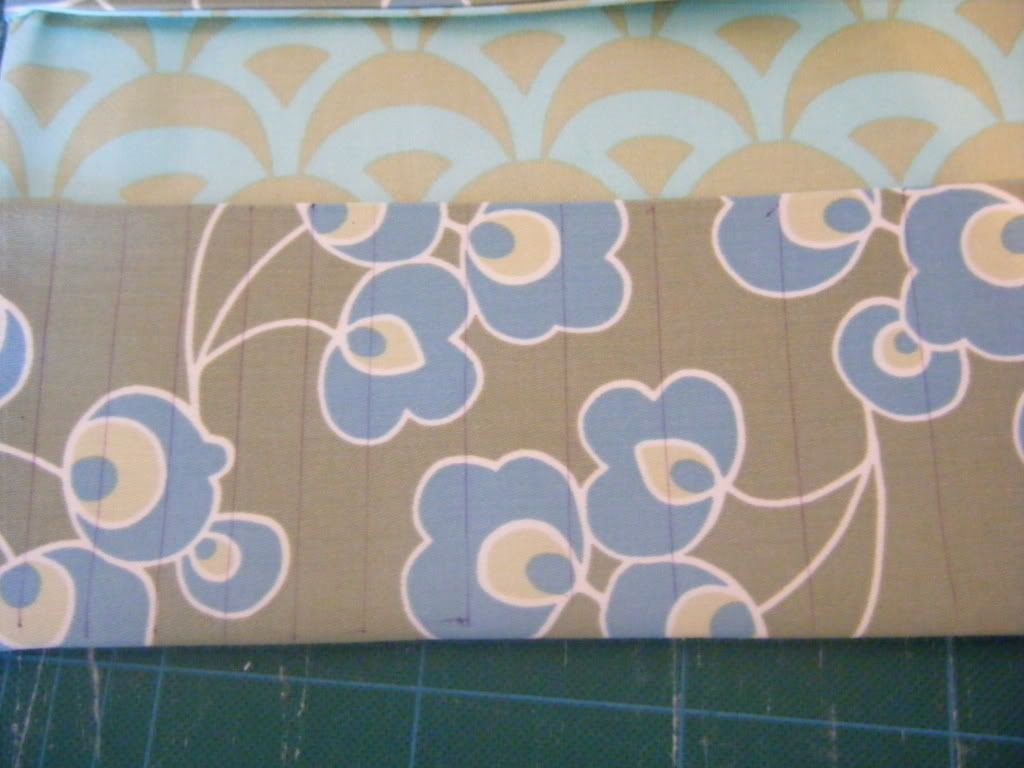
Now you are going to create the pockets. You can either do this by eye, use a quilting guide, or drawer the lines to be stitched on with a removable/fading/wash off pen. I left a big gap on the right, about 4 inches I think, for scissors and "stuff", then I marked out a line 2 inches away, then 1 3/4, then 1 1/2 etc, down to 1 inch, then I alternated the rest of the lines between 1 inch and 5/8 inch to make room for different sized hooks.
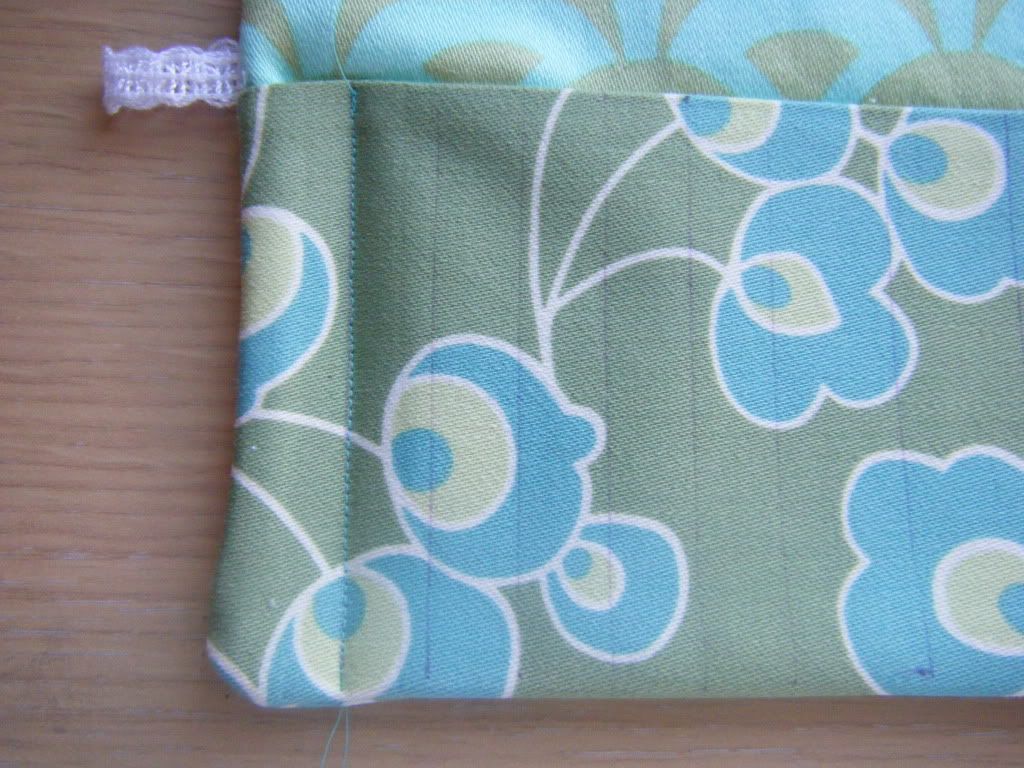
Use either a contrasting thread or one that will blend in and stitch down each line, back tacking a little at either end. I used my walking foot for this and didn't have any puckering problems as I'd had with the needle roll.
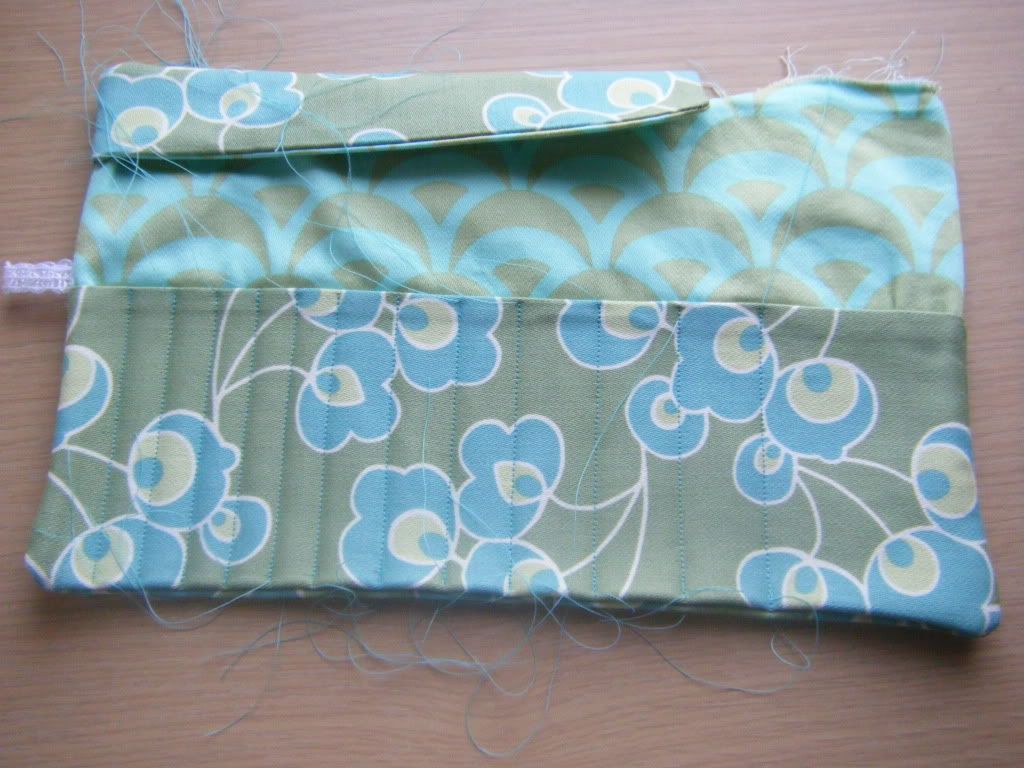
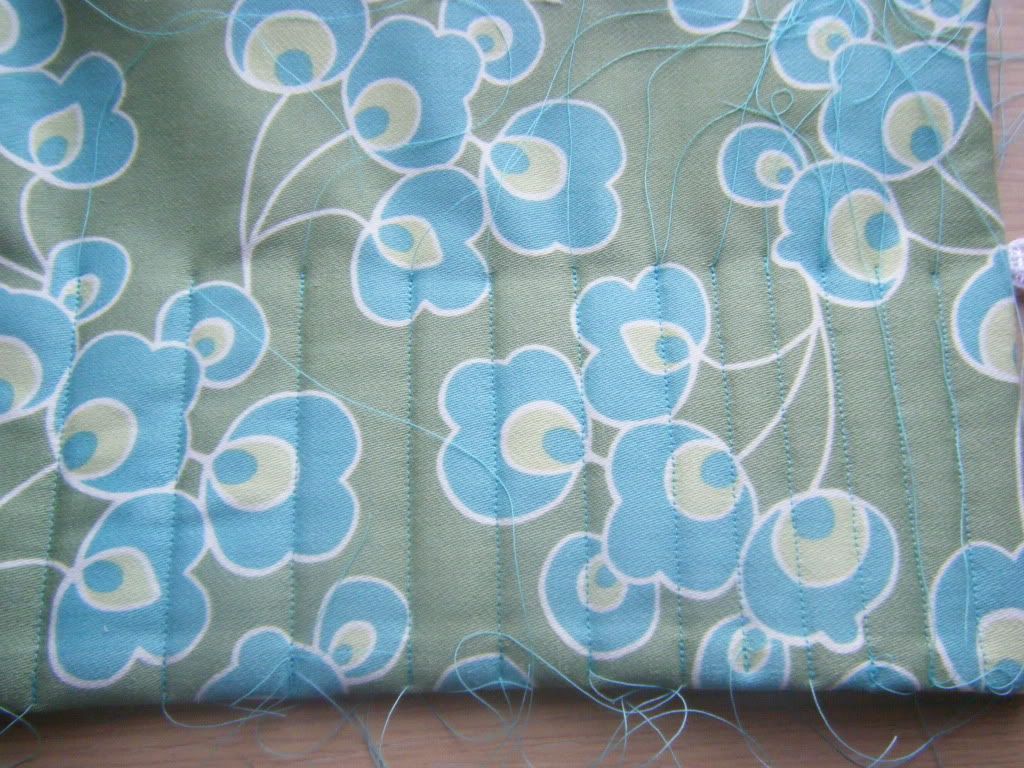
Quilt along all your lines, then snip the threads, unless you prefer the wild look as above.
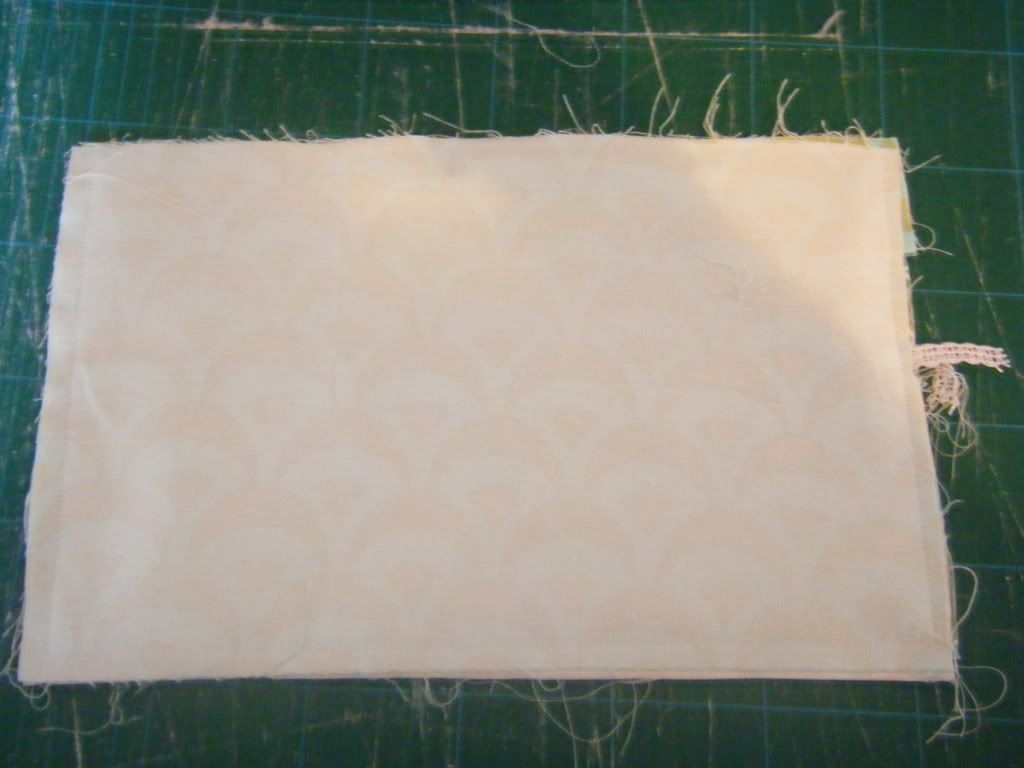
Once again, I seemed to think you'd like to see the back...
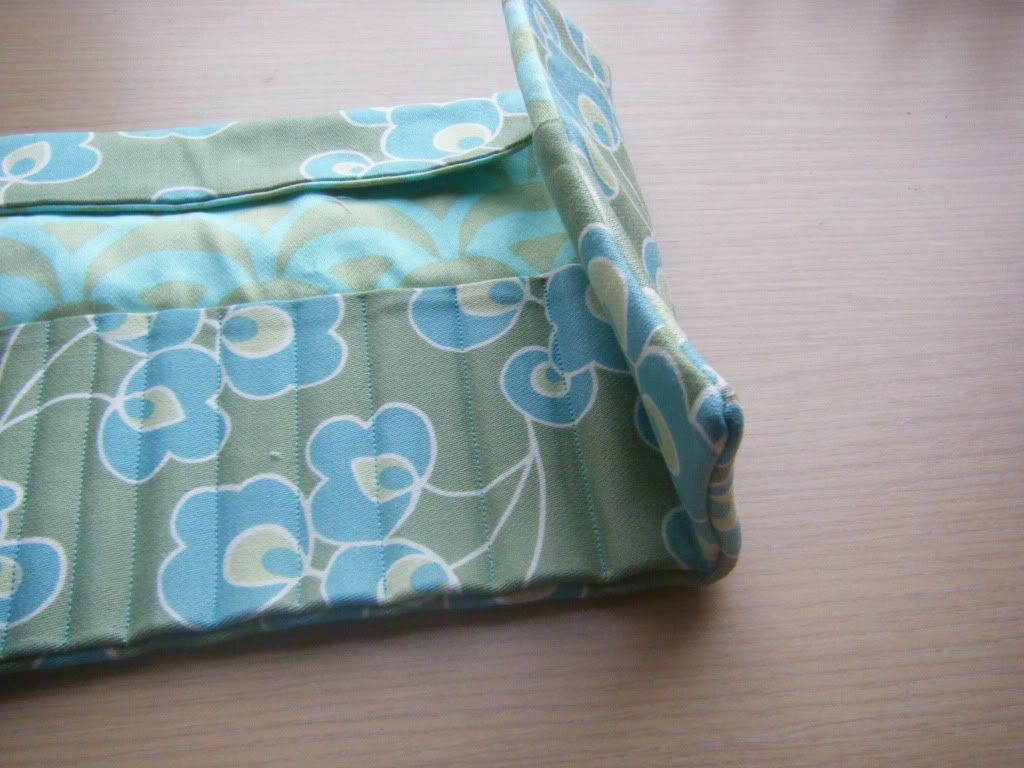
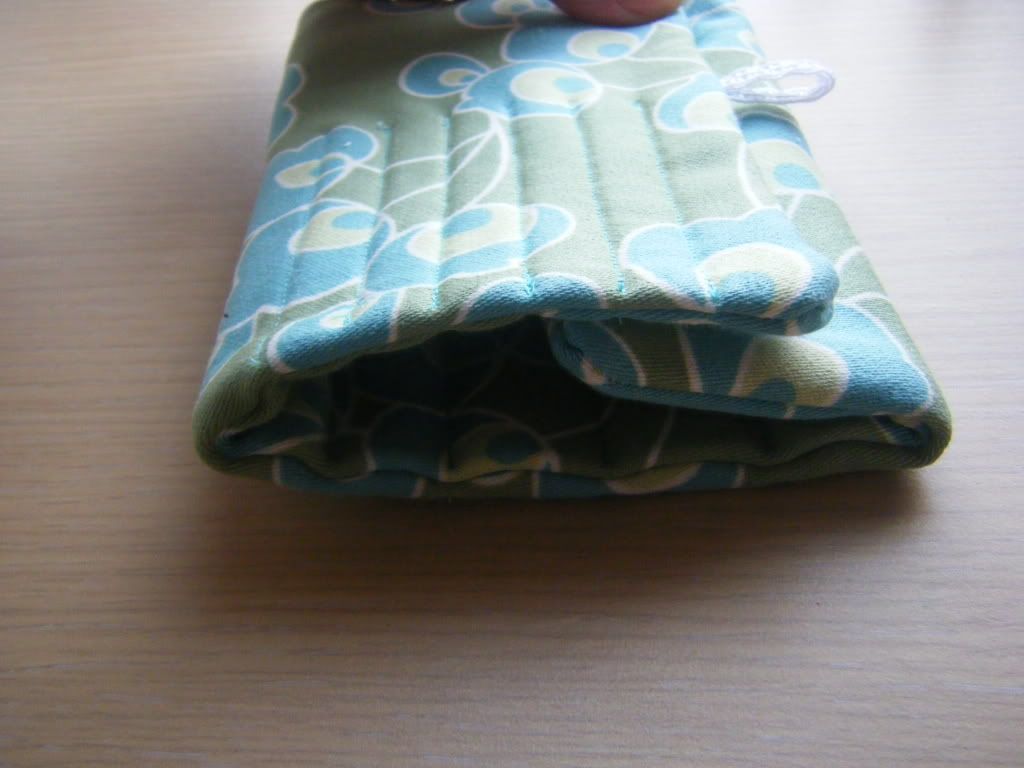
Fold your case along one of the lines to the right, press the seam to help it fold.
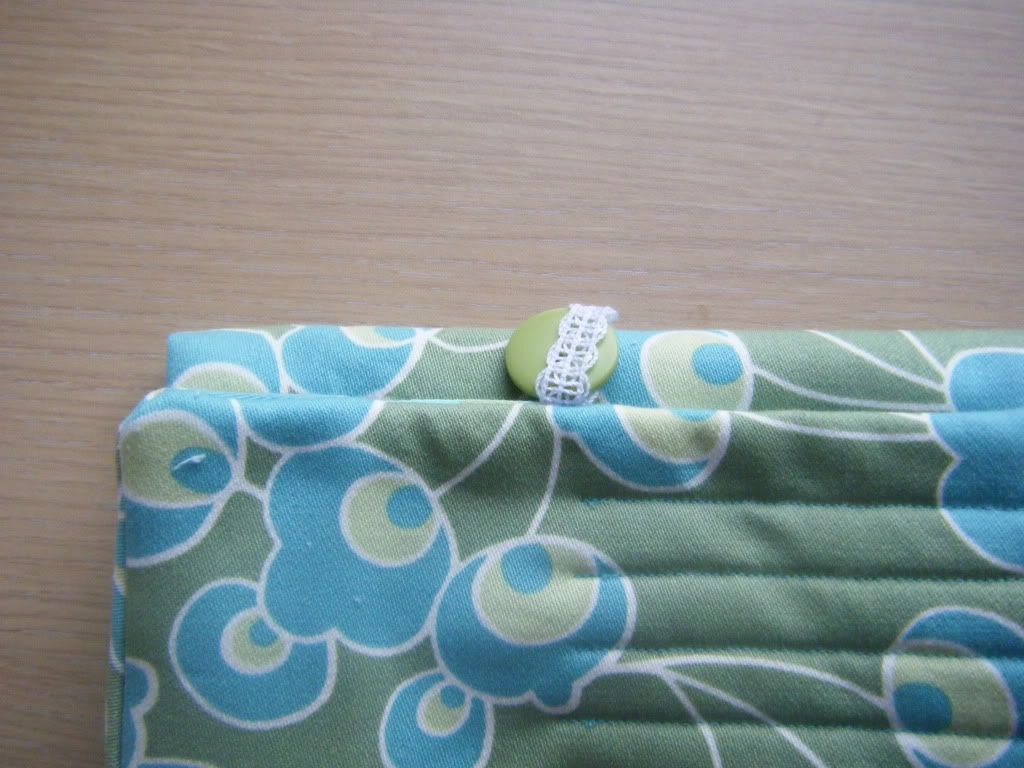
Then fold the left side in along one of those lines until it looks nicely layered. Find a button that will fit through your loop (you can plan this bit in advance, but who doesn't like the "damn, I don't have a matching button that fits" moment at times like this? Strangely enough, I did have a matching button that fitted...)
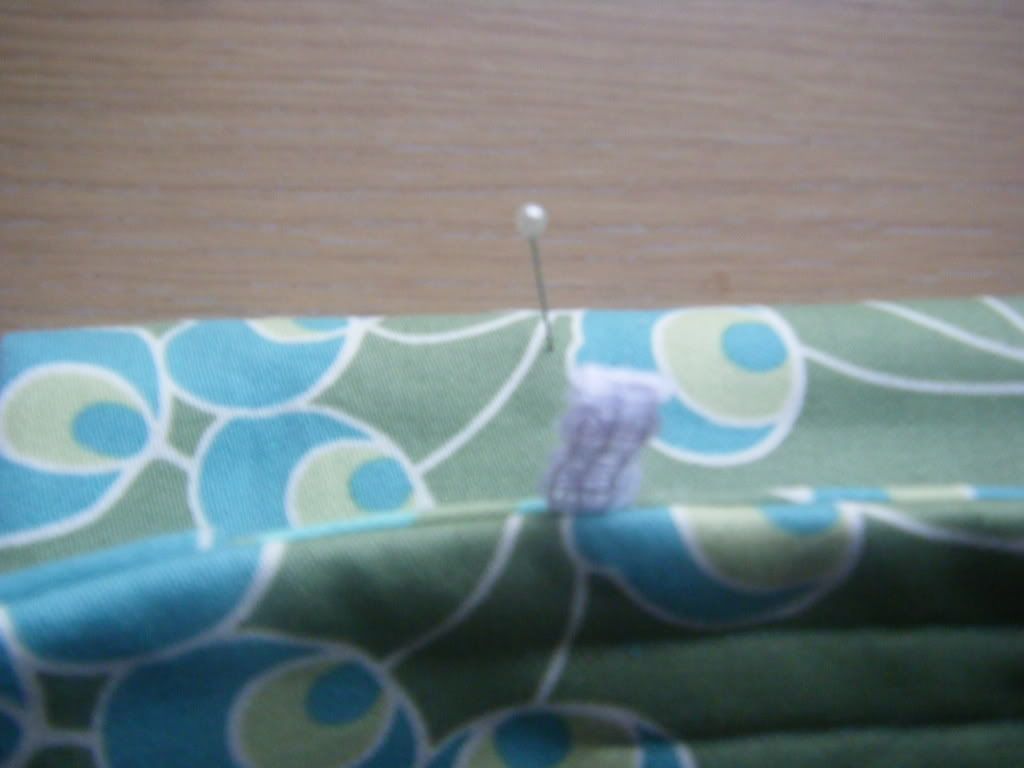
Stick a pin where your button was to mark the spot, then sew your button in place.
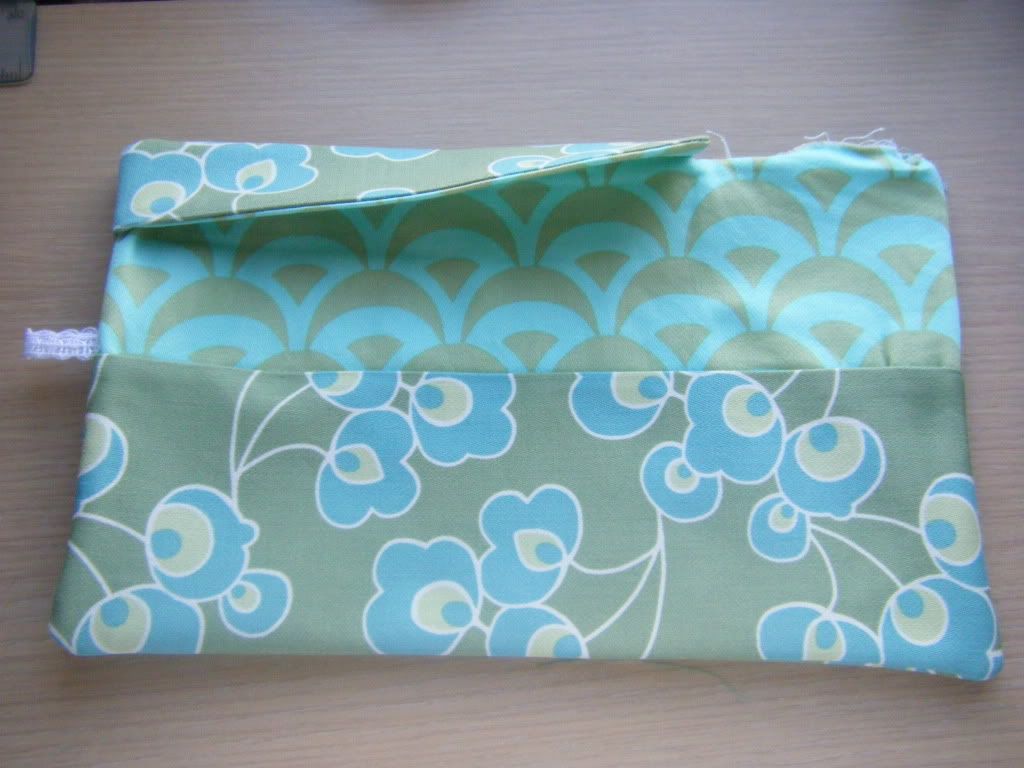
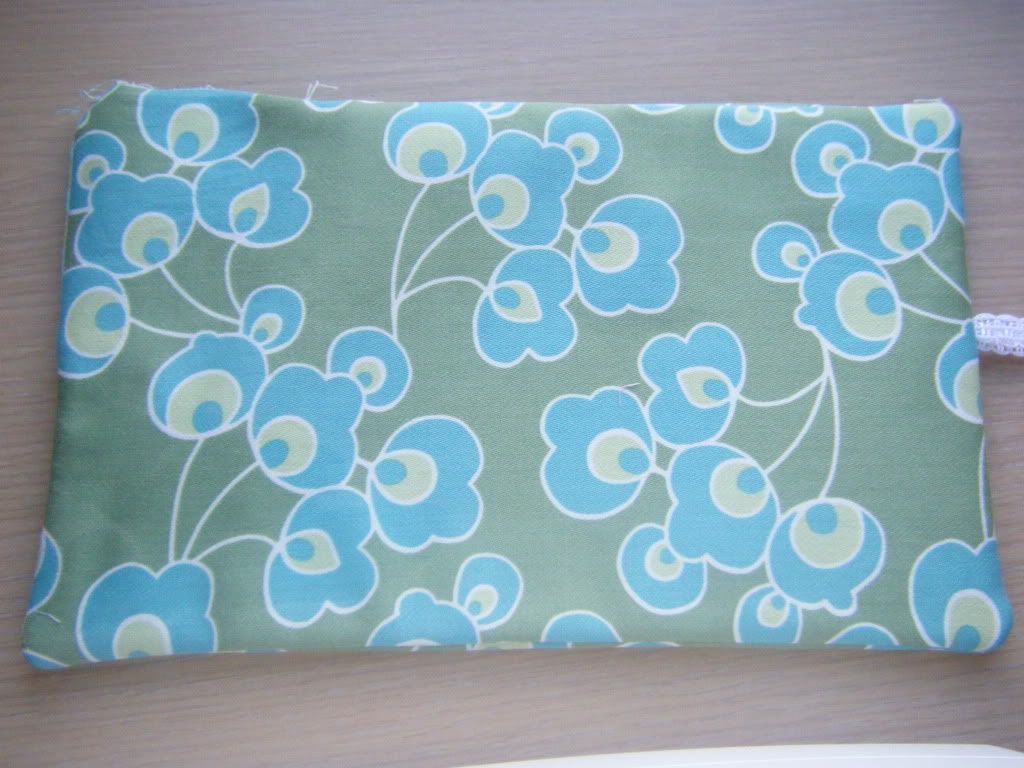
Here's what it'll look like from the back.
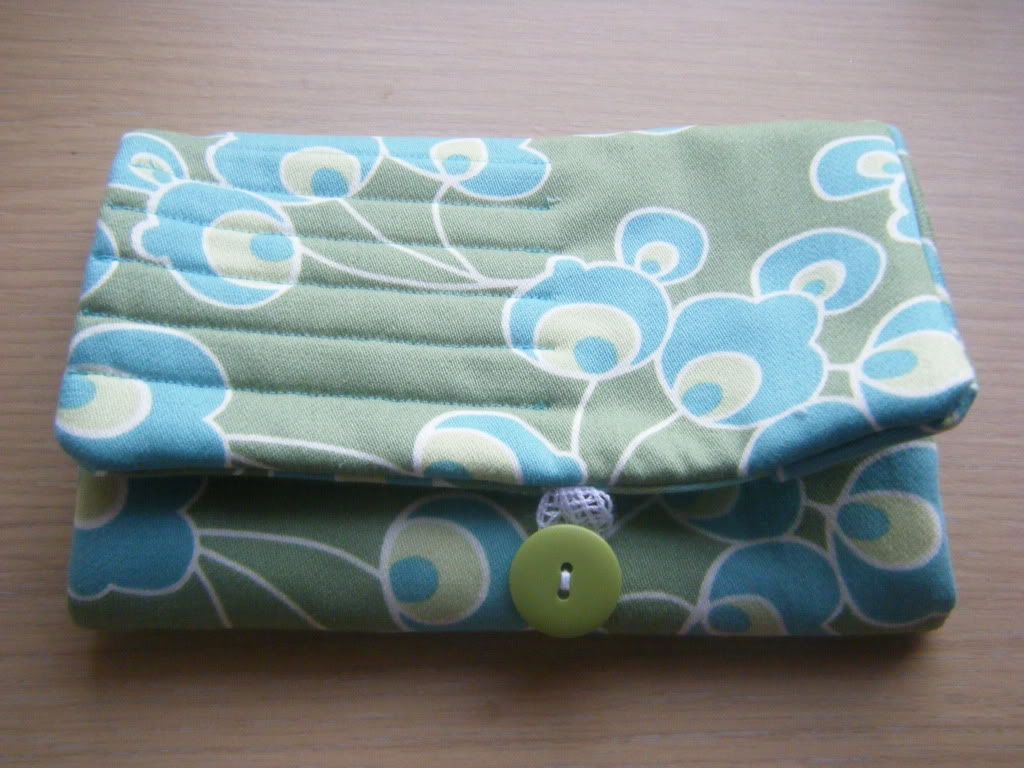
And here's how it looks all folded up.
Much better than the last one!
I'm using the same fabrics as they are both destined as a birthday present for my mum.
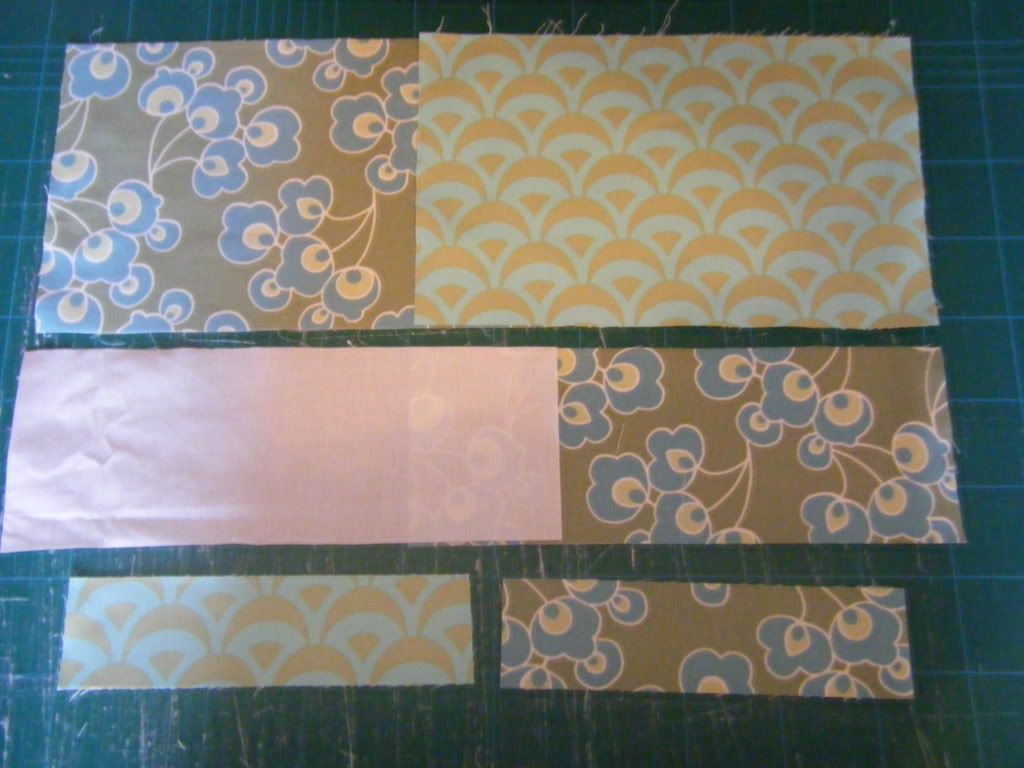
First, cut out your fabric. You need:
1 x outer fabric 12 x 7.5 inches
1 x inner fabric 12 x 7.5 inches
1 x fusible fleece 11 3/4 x 7 1/4 inches
1 x flap outer 8.5 x 2 1/4 inches
1 x flap lining 8.5 x 2 1/4 inches
1 x pocket outer 12 x 4.5 inches
1 x pocket lining 12 x 4.5 inches
a 2 inch length of ribbon/braid/string
a button
I used plain white fabric for my pocket lining to prevent too much bulk as my fabric is home decor weight. The inside of the pocket wont be seen. Quilting weight fabric will work fine, you could also use denim or linen, whatever you fancy.
Place your pocket pieces and your flap pieces right sides together and pin.
For the pocket, sew one long edge only, flip so the fabrics are right sides out, press, topstitch if you want to. I didn't. Because I forgot, not for any scientific or design reason!
For the flap stitch one long edge and one short edge, depending on whether you want the flap on the left (like mine) or the right (not like mine). The short edge that you sew up will be facing into the middle of the roll, not the edge. Again flip, press, topstitch (or not).
I cut my fusible fleece a quarter of an inch smaller all round than the outer piece. This just makes it easier to fuse in place without making a mess of your ironing board, iron or pressing cloth. As it's only an 1/8 inch smaller along each edge it will still be caught in the seam allowance in case it becomes unstuck later. I have had that happen to me, usually when I'm doing lots of turning, turning, unpicking, resewing, turning, turning, unpicking etc. Fuse the fleece to your outer piece.
Place your outer piece right-side-up on a flat surface, put the pocket, also right side up on top, lining up the bottom and side raw edges. Add the flap to the top corner with the two raw edges lined up with the left edge and the top edge.
Place your outer piece on top, right side down. Fold your ribbon/braid/string/lock of hair in half and tuck inside your sandwich. It needs to be loop-face inwards, raw edges sticking out about half an inch. I positioned mine just above the pocket.
Pin the whole heap together.
Sew all the way round, leaving a 4 inch turning gap along one edge. I would recommend doing this where there is only 2 layers of fabric - so on the upper edge towards the right, next to your flap.
Clip your corners, turn the whole thing inside out, making sure your pocket is on the inside and not the outside (cue loads of confusion as I can't figure out why my pocket is facing the wrong way... then realise you just need to turn it!), press the seams and top stitch if you want. I didn't, not because I forgot this time but because the seams were so bulky that I would have made a right mess of it.
Slip stitch or ladder stitch your opening closed. For some reason I thought you might like to see a picture of the back at this stage.
Now you are going to create the pockets. You can either do this by eye, use a quilting guide, or drawer the lines to be stitched on with a removable/fading/wash off pen. I left a big gap on the right, about 4 inches I think, for scissors and "stuff", then I marked out a line 2 inches away, then 1 3/4, then 1 1/2 etc, down to 1 inch, then I alternated the rest of the lines between 1 inch and 5/8 inch to make room for different sized hooks.
Use either a contrasting thread or one that will blend in and stitch down each line, back tacking a little at either end. I used my walking foot for this and didn't have any puckering problems as I'd had with the needle roll.
Quilt along all your lines, then snip the threads, unless you prefer the wild look as above.
Once again, I seemed to think you'd like to see the back...
Fold your case along one of the lines to the right, press the seam to help it fold.
Then fold the left side in along one of those lines until it looks nicely layered. Find a button that will fit through your loop (you can plan this bit in advance, but who doesn't like the "damn, I don't have a matching button that fits" moment at times like this? Strangely enough, I did have a matching button that fitted...)
Stick a pin where your button was to mark the spot, then sew your button in place.
Here's what it'll look like from the back.
And here's how it looks all folded up.
Much better than the last one!
Sunday, October 30, 2011
My Crafty Christmas plans
Hi, I'm Helen from Josie and May. This is my first time blogging with Crafty Christmas Club (thanks Tilly for setting this up!), but I did enjoy reading all the posts last year and I've been making presents for friends and family for quite a few years now.
I''m not making too many presents this year - partly due to the amount of time left, but mostly because I'm knitting this beauty for my brother in law -
He's been pestering me for a Mark Darcy sort of Christmas jumper for years, so last year he got the pattern for his present, with the promise of a finished jumper this year. So far I've finished the back, and am up to rudolph's nose on the front.
It's not perfect. There are a few places where I've switched yarns and it's a little loose or I've not wrapped the yarns properly, but nothing that can't be sorted once I've finished. And it's hard work having four balls of yarn on the go at once.
Last year I'd planned on making some decorations, and even got as far as buying the materials, but I was channelling my energy into finishing presents so never got round to them. (Also, as I'm don't spend Christmas day itself in my flat, I never feel like I *have* to decorate - sad, I know!).
So this year I'm determined to make lots of decorations in short bursts to fill my flat with Christmas cheer. First on the list is Christmas bunting using these fabrics (from Beyond Fabrics on Columbia Road and Seamstar).
I may need more than these three fat quarters, but I'm going to see how many triangles I can get from them before I start buying more!
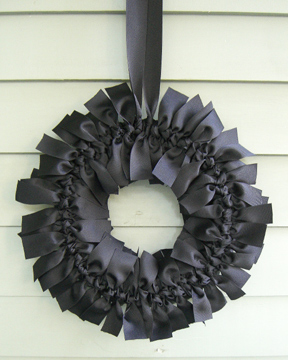
And no home is complete without a wreath. I fell in love with this ribbon wreath when I spotted it last year.
This all black one is for Halloween, but I bought green, red and gold satin ribbon from a market stall last year (I'm hoping I don't regret not getting grossgrain ribbon, but the amount needed would cost more than I was comfortable spending). Rather than buy a foam wreath I got some wire, so I may need to pad that out a bit before I start tying the ribbon.
But then this year I spotted this on Pinterest. So if I can find the foam wreath then I'm hoping to make this one too. What? More Christmas wreaths than bedrooms is totally ok, no?
I will be making a few make up bags using Flossie Teacake's excellent pattern for presents for friends and family. Best £3.50 I've spent on a pattern - I've made so many of these!
I've been planning on giving my Mum this shawl from a Rowan book for, oooh, probably 5 years. That's how long I've had the book and the yarn (Sirdar Wash and Wear double crepe dk). But it took me a long time to get my head round the lace pattern, and now that I have the brother in law's jumper is getting in the way! Hopefully this will be ready in time, but if not it'll make a lovely Mothers Day present.
So that's the crafting sorted, and I haven't even thought about baking! I'm organising and taking part in a Christmas bake-off at work, so any suggestions of Christmas themed goodness kindly accepted!
I''m not making too many presents this year - partly due to the amount of time left, but mostly because I'm knitting this beauty for my brother in law -
He's been pestering me for a Mark Darcy sort of Christmas jumper for years, so last year he got the pattern for his present, with the promise of a finished jumper this year. So far I've finished the back, and am up to rudolph's nose on the front.
It's not perfect. There are a few places where I've switched yarns and it's a little loose or I've not wrapped the yarns properly, but nothing that can't be sorted once I've finished. And it's hard work having four balls of yarn on the go at once.
Last year I'd planned on making some decorations, and even got as far as buying the materials, but I was channelling my energy into finishing presents so never got round to them. (Also, as I'm don't spend Christmas day itself in my flat, I never feel like I *have* to decorate - sad, I know!).
So this year I'm determined to make lots of decorations in short bursts to fill my flat with Christmas cheer. First on the list is Christmas bunting using these fabrics (from Beyond Fabrics on Columbia Road and Seamstar).
I may need more than these three fat quarters, but I'm going to see how many triangles I can get from them before I start buying more!
And no home is complete without a wreath. I fell in love with this ribbon wreath when I spotted it last year.
![]() |
| http://thelongthread.com |
But then this year I spotted this on Pinterest. So if I can find the foam wreath then I'm hoping to make this one too. What? More Christmas wreaths than bedrooms is totally ok, no?
I will be making a few make up bags using Flossie Teacake's excellent pattern for presents for friends and family. Best £3.50 I've spent on a pattern - I've made so many of these!
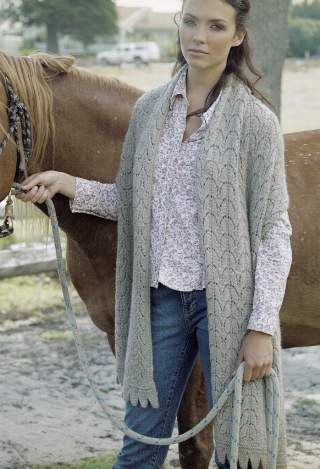
I've been planning on giving my Mum this shawl from a Rowan book for, oooh, probably 5 years. That's how long I've had the book and the yarn (Sirdar Wash and Wear double crepe dk). But it took me a long time to get my head round the lace pattern, and now that I have the brother in law's jumper is getting in the way! Hopefully this will be ready in time, but if not it'll make a lovely Mothers Day present.
![]() |
| Kashmir Shawl in Rowan classic alpaca (book 13) Source: www.englishyarns.co.uk |
Sunday, October 23, 2011
Knitting Needle Roll tutorial
Hello, it's Wendy from The Crafter's Apprentice here with a little tutorial for you. One of the lovely ladies in this club wanted to make a knitting needle roll and as I was making one for my mum, I offered to take photos. Unfortunately, I can't find the post so I can't remember who it was. I've blogged about this on my own blog so apologies to anyone that follows both (sorry Sandra!), you're about to get a sense of deja vu!
As I was using offcuts from a different project, the inner fabric wasn't quite big enough. Instead, I cut what I had (to 23 x 19 inches), then added a strip 23 x 3 inches to the bottom, ironing the seams open. You could of course make the whole roll, or just the outer piece, from patchwork.
Fuse your fusible fleece to the back of your inner fabric panel. I cut it 1/2 inch smaller all round so the seams wont be so bulky and so that you can line it up easier than if it were the same size as the fabric panel. Make sure you fuse well - it does take a bit of time, but trust me, it's annoying when it doesn't stick properly and unpeels later.
Now to create the pocket. Pin the pocket and pocket lining fabric right sides together and sew using a 1/4 inch seam allowance. Leave a big gap for turning along the bottom as it'll get sewn shut later. You do not need to slip stitch it shut.
Turn the right way out, poke out your corners (I use my trusty paintbrush that's never seen paint in its life) and press. I then top stitches 2 parallel lines in my contrast thread along the top edge, roughly 1/8 inch from the top and then 1/8 inch from that line.
You can either wing the next part, use a seam guide, or draw on your lines. I didn't think about using the seam guide (which would have been a good idea) until I'd finished so I drew on lines using my fade-away pen. The first was 2 inches from the edge, the next 1 3/4 inches etc down to 7/8 inch. I then alternated between 1 inch gaps and 7/8 inch gaps - remember that knitting needles come in different widths. Now pin the pocket panel to the bottom of the inner piece - I should probably mention at this point that the 23 inches is the width. You may also notice my pocket panel is too small, that's because I cut it too short, I adjusted the measurements for you!
Sew down these lines with your contrast thread. I made a mistake on the first few I did. I started at the bottom and so the fabric puckered at the top. Make sure you sew top down each line, then any puckers at the bottom will be hidden in the seam later.
Sorry about that poor photo. Even though I took this in the sunniest room in the house during the day and turned the light on my sewing machine off, you have to remember that I live in England and it is October! The following photo shows you what it looks like after you've sewn your lines, you can see on the ones to the left the puckers caused by sewing bottom up. Snip off your threads from the front of the piece, don't worry about the back.
Cut your ribbon in half, place the two pieces together and pin about half way down on the right edge. Make sure you place your pin at least 1 inch away from the edge of the fabric or your sewing machine needle may have a nasty accident.
Place the outer and inner panels together, right sides in and pin all around, leaving a gap for turning. I would strongly advise you do this on the left side (away from the ribbon) and above the pocket. I stupidly left my gap on the pocket and had a right palaver hand sewing it up later.
Sew all the way round, turn, poke out those corners and press. Now slip stitch or ladder stitch your opening closed. I originally left the gap on the pocket as I was planning to top stitch all the way round, but after turning I realised it would be messy as there is a lot of bulk in the bottom edge and the bottom half of the side edges.
Fill with knitting needles - these are mine, I have ordered mum a set to go in this, but they haven't arrived yet. Probably because I only ordered them after I'd made it!
To roll it up, fold down the flap onto the needles and roll from the left, then wrap the ribbon around the roll and tie in a bow.
Ta da! One knitting needle roll and one very washed out photo.
That's a better photo. I hope this was useful to at least one of you!
You should know that I'm no sewing expert - or expert in anything actually (Oh, maybe plastics. And the USSR and Poland during communist times. And maybe English grammar, none of which help me sew a straight line), however I do know how to make a knitting needle roll as it was one of the first things I made and I've since thought about how I can improve that design. I made a couple of mistakes and they will help you to make a perfect roll!
I'm using the leftover Amy Butler home-dec weight fabric I used to make knitting/crochet baskets for both me and my mum eons ago.
You will need:
Outer fabric 23 x 21 inches
Inner fabric 23 x 21 inches
Fusible fleece 22.5 x 20.5 inches
Pocket fabric 9.5 x 23.5 inches
Pocket lining fabric (I chose a plain white as it wont be seen) 9.5 x 23.5 inches
Approx 30 inches of ribbon
Matching sewing thread
Contrasting sewing thread
As I was using offcuts from a different project, the inner fabric wasn't quite big enough. Instead, I cut what I had (to 23 x 19 inches), then added a strip 23 x 3 inches to the bottom, ironing the seams open. You could of course make the whole roll, or just the outer piece, from patchwork.
Fuse your fusible fleece to the back of your inner fabric panel. I cut it 1/2 inch smaller all round so the seams wont be so bulky and so that you can line it up easier than if it were the same size as the fabric panel. Make sure you fuse well - it does take a bit of time, but trust me, it's annoying when it doesn't stick properly and unpeels later.
Now to create the pocket. Pin the pocket and pocket lining fabric right sides together and sew using a 1/4 inch seam allowance. Leave a big gap for turning along the bottom as it'll get sewn shut later. You do not need to slip stitch it shut.
Turn the right way out, poke out your corners (I use my trusty paintbrush that's never seen paint in its life) and press. I then top stitches 2 parallel lines in my contrast thread along the top edge, roughly 1/8 inch from the top and then 1/8 inch from that line.
You can either wing the next part, use a seam guide, or draw on your lines. I didn't think about using the seam guide (which would have been a good idea) until I'd finished so I drew on lines using my fade-away pen. The first was 2 inches from the edge, the next 1 3/4 inches etc down to 7/8 inch. I then alternated between 1 inch gaps and 7/8 inch gaps - remember that knitting needles come in different widths. Now pin the pocket panel to the bottom of the inner piece - I should probably mention at this point that the 23 inches is the width. You may also notice my pocket panel is too small, that's because I cut it too short, I adjusted the measurements for you!
Sew down these lines with your contrast thread. I made a mistake on the first few I did. I started at the bottom and so the fabric puckered at the top. Make sure you sew top down each line, then any puckers at the bottom will be hidden in the seam later.
Sorry about that poor photo. Even though I took this in the sunniest room in the house during the day and turned the light on my sewing machine off, you have to remember that I live in England and it is October! The following photo shows you what it looks like after you've sewn your lines, you can see on the ones to the left the puckers caused by sewing bottom up. Snip off your threads from the front of the piece, don't worry about the back.
Cut your ribbon in half, place the two pieces together and pin about half way down on the right edge. Make sure you place your pin at least 1 inch away from the edge of the fabric or your sewing machine needle may have a nasty accident.
It's a good idea to also pin the other end of the ribbon to the centre of the pockets to make sure you don't accidentally sew it into a seam later.
Place the outer and inner panels together, right sides in and pin all around, leaving a gap for turning. I would strongly advise you do this on the left side (away from the ribbon) and above the pocket. I stupidly left my gap on the pocket and had a right palaver hand sewing it up later.
Sew all the way round, turn, poke out those corners and press. Now slip stitch or ladder stitch your opening closed. I originally left the gap on the pocket as I was planning to top stitch all the way round, but after turning I realised it would be messy as there is a lot of bulk in the bottom edge and the bottom half of the side edges.
Fill with knitting needles - these are mine, I have ordered mum a set to go in this, but they haven't arrived yet. Probably because I only ordered them after I'd made it!
To roll it up, fold down the flap onto the needles and roll from the left, then wrap the ribbon around the roll and tie in a bow.
Ta da! One knitting needle roll and one very washed out photo.
That's a better photo. I hope this was useful to at least one of you!
Subscribe to:
Posts (Atom)