Showing posts with label furnishings. Show all posts

Thursday, December 22, 2011

Pillows, Snoods & Table Decorations!

Hi everyone! It's been awhile since I posted here due to some unexpected travel, but here's what I've been up to in the crafty Christmas world:

Pillows
I made these pillows for my sister from fabric she bought on our trip to Hawaii last year (Kapaia Stitchery on the island of Kaua'i, great prices!). These were supposed to be for her birthday in February (oops), but better late than never! I bought pillows from the craft store and just sewed 2 fabric pieces together and flipped them right side out. I slipstitched them closed after inserting the pillow. I bought the blue fabric to make a dress, but borrowed some of it here since I thought it made for a more complete group!


Snood Fever Continues!
This is my version of the snood made world famous by Karen from Did You Make That? I made 3! This snood is made from Merino wool that I bought at the Brooklyn General Store in Brooklyn, New York and was my first knitting project in years. I started it in New York and finished it in Virginia! This one went to my friend who is heading back to France next month. Should keep her nice and toasty.


Table Runner/Napkins

And finally, I made a table runner and napkins for my mom, as she loves decorating for the holidays. I gave them to her a bit before Christmas so she could enjoy the festiveness! For the table runner, I used sew-in interfacing to weigh down the lighter weight reindeer cotton and found that slowly ironing out the bumps in the fabric helped keep the fabric flat. I also used my walking foot which helped keep the fabric layers from shifting.

The napkins were made using the rolled hem setting on my overlocker. It's the first time I've used this feature and I love how it turned out! It looks like the edges are bound with a narrow bias tape and it was so fast and easy to make.


Happy holidays, all!

~Amanda from Sewin' in the Rain

Sunday, December 11, 2011

Gum Drop Pillow

Hi!  Magpie Mimi here and glad to say one more Christmas present ticked off the list!  My eldest sister gave me a whole bunch of fabric that she found on super sale and I thought I should make her something nice from some of it so she's getting an Amy Butler Gum Drop Pillow and so will a few other family members as they're quick and easy to make and will hopefully go down a storm.

Grey/cream background colour fabric with sketched on flowers with white highlights.  Think they're dog roses.  It has eight segments and an octagon on the top to cover the joins of the segments.

By some chance of luck I managed completely by accident to cut the octagon for the top with a flower right in the centre!  So chuffed!
Side on view showing the pattern of the fabric more.
 The cotton is quite soft and shiny and will hopefully compliment her living room as it's mostly white and greys.  I know it's not a practical cushion with two children, but since the rest of her living room are in these colours she must be able to cope! hehe!  All I can say is she must have shares in Vanish!


Tuesday, November 29, 2011

Let The Countdown Begin...

A big Hello to all you Crafty Christmas Aficionados from Elisalex at Stitch me Softly...

With just a couple of days until the countdown officially begins, I bring you an(other!) frame repurposing project - an Advent Calendar with little hanging pockets for each day to fill with activity ideas, trinkets, treats, whatever you want.


You can find the full tutorial here (you might want to scroll down a little to avoid only slightly relevant ramblings!), plus ideas on pocket fillers.


Thanks!

Sunday, November 13, 2011

Miscellany table runner finished!

Okay - last post on the Miscellany table runner! Post-Thanksgiving I'll have to seriously get to work on some other projects. But I'm really excited about how this came out and wanted to share a final snap of the finished table runner.

If you want to see it in full glory covered with our Thanksgiving dinner, after I give it to my mom as an early Christmas present, check my blog in about two weeks!

Next time you hear from me, I promise to have a new project!

Sunday, November 6, 2011

Miscellany table runner pinned and ready to quilt

I finished the top of my Miscellany table runner and it's pinned and ready for quilting. Which I hope to find the time for tomorrow. We're a week away from flying home so that's plenty of time to get this done. Right?

If you'd like to see the progress, here are some snaps!


This has been such a fun process. I geekily love the math involved with getting everything to fit the way I want it and if I make a mistake, I just add another piece of fabric. See what I mean?


I LOVE the way it is looking so far and can't wait for it to be covered in yummy Thanksgiving food!


Monday, October 24, 2011

Miscellany table runner update!

Hi everyone! I wanted to share an update on the table runner I'm making for my mum for Christmas (but giving to her at Thanksgiving). I put in a lot of time over the weekend on these improvisational blocks.

Here's a look at the blocks laid out and numbered. Our table is a unique size because my dad made it years and years ago, so it's going to be a bit wider than the Purl Bee version I'm using as inspiration.


I've never pieced like this and it's so much fun. I started building the blocks by cutting strips and then it became a game to see how I could use up scraps. After I lined up what I had I did a lot of math to see what I needed to do to get to the finished size I wanted and added to some of them as needed. I decided to put a border around each of them because I felt the combination of scrappy piecing and the eclectic collection of prints needed some consistency.

Here are a couple of blocks up close. Taking these gave me a chance to use our new tripod!


I just love this fabric collection!

Wednesday, October 19, 2011

First on the list: A Thanksgiving table runner!

Hi everyone! I'm Annie and I'm new to the Crafty Christmas Club. My blog is called The Daily Stitch and it's part of my (soon-to-be) online shop, The Village Haberdashery. I live in London.

I've already been so inspired by your ideas which is good because I need to get started immediately on one! My mum and I host Thanksgiving every year for as many as 30 family members. It's my favourite holiday and we love planning the menu together and cooking, which is a lot of work but so much fun. I always see beautiful tutorials for napkins but I can't imagine making that many and she'd never use most of them the rest of the year. So I thought I'd try a quilted table runner.


But I'm not so into applique so I'm going to piece the front instead. My idea is to make some improvisational blocks like Ashley at Film in the Fridge did in this stunning quilt:

I'm going to use Miscellany by Julia Rothman for Cloud9. Isn't it pretty? I'll sash and back it with the linen.

The catch is that we leave for Seattle for Thanksgiving on the 14th of November AND I'm going to Quilt Market next week! I wanted to give it to her as an early Christmas present since I won't be there for Christmas and so it can be used for Thanksgiving. So it's going to be very, very busy for the next few weeks. I'm hoping to get some hours in on this at the weekend, so I'll be back with an update after that. Wish me luck!

Nice to meet you!

Tuesday, December 7, 2010

Peg Bags!

Hi, I'm Tabatha from Thread Carefully and this year I've made a few people peg bags for Christmas. They are really quick and easy to make, and they're a good thing to give to the person who seems to have everything, or to someone you have no idea what else they might like.

Here's how I made mine. You will need 1/2 metre of fabric, bias binding to match, thread and a child-size hanger (by this I mean a hanger for children's clothing, not a hanger the size of a child!).

Step One - Cut two rectangular pieces of fabric, about 18"x14" (approx. 45cm x 35cm). Place your hanger at the top and draw along its edge. Cut along the line. (Tip: I overlocked the very top edge of each piece of fabric too, because you have to leave a gap for the hanger to go through, and I wanted to finish the raw edge, even though it ends up being tucked in). At the bottom, cut the corners into a curve. You should end up with two identical pieces of fabric looking like this:


Step Two - Take one of the pieces of fabric, and about a third of the way down from the top, draw and then cut the peg bag opening. It should measure at least 7", so that you can get the hanger in at the end.


Step Three - Use the bias binding to bind the raw edges of the fabric at the peg bag opening. I used ribbon because I couldn't find bias binding in a complementary colour, and I didn't have enough fabric to make my own. I pressed my ribbon in half lengthways (as you would also do with bias binding), and stitched it over the raw edges:


Step Four - Lay your front piece and back piece right sides together, and stitch together, remembering to leave a gap at the top where the hanger will go through.


Step Five - Clip the curved edges.


Step Six - Turn inside out, through the peg bag opening. Insert your hanger, and you're done! If you like, you can now add some decorative ric-rac, buttons, embroidery, applique...whatever takes your fancy! The peg bag I've shown here is for my grandfather-in-law, so I'm leaving it plain!

Monday, December 6, 2010

Baby quilt


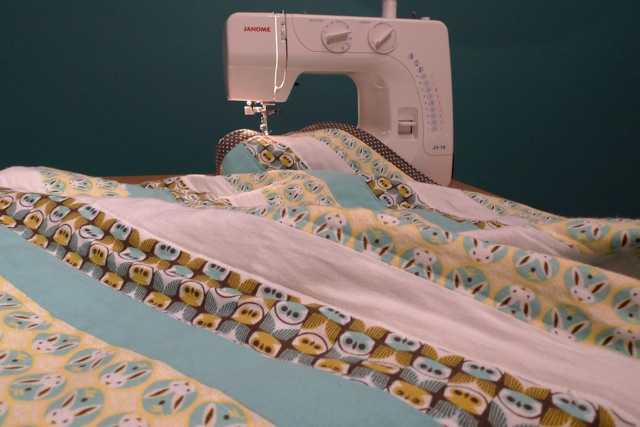
I've just finished this quilt, made for my baby niece. It's made with a selection of super soft Cloud 9 flannels which were in a quilting pack, complete with simple instructions for the faint hearted, that Saints and Pinners kindly sent me to test out. It took about three evenings to make, not bad for my first quilt. I did take a hefty short cut though, topstitching the edging on the machine rather than slipstitching by hand, which resulted in some rather wonky stitches... but hey, it's "charming"! It's so soft and snuggly - I can't stop cuddling it. More details on my blog.

Monday, November 22, 2010

Gifts for the Navigator

This is one of my favorite projects to date. I am a bit of a map enthusiast myself and I think this turned out really nice.


Do you want to see some more ideas for gifts for the navigator?

Check out my new Pinterest board with ideas.

Wednesday, November 17, 2010

Christmas Market


I haven't started on the gifts yet, my son goes to the coolest elementary school and in order to pay for their surfing lessons, yes, you have read me right, surfing lessons amongst other cool things they do all year, they have a Christmas Market/Bake Sale and I made a series of colorful Christmas placemats for them to sell. 
With the leftovers, that's what happens when you buy yards in the States and then find European matching fabric in meters, I made little gift bags for small items.


You all sew so well, tutorials are moot right?

Saturday, November 13, 2010

Beautiful napkins. The perfect gift. And a tutorial too.

I wanted to create the perfect bordered napkin.   I think I succeeded.

I did a picture heavy tutorial on my blog if you would like to re-create.

Napkins are ALL about the fabric.  So make sure you get something lovely and soft for the main surface and then something pretty / groovy / funky for the outside.

lore
x

Friday, November 12, 2010

Another housewarming *ahem* Christmas gift: plastic grocery bag holder tutorial

So I dropped my peg bag gift around to my friend house the day they moved in.   I had a day off and went over with soup, bowls, spoons, ladle, drinks, glasses etc and gave them lunch.  I know what its like moving and no matter how well you label your boxes, you can never find what you're after.

I did notice however that they had unpacked a few things and there was a sad sorry sight of a plastic gocery bag holder - or 'bag bag' that was better off in the bin bin. 

So I had to make them another.

Luckily I had more cute fabric left over.

I kind of just straightened up what was left and made it out of that but I think the measurements are just right. 40cm wide x 45cm long.
Scientifically calculate the amount of elastic needed.   ie.   wrap it in a circle as big as you'd like your opening.
Mine turned out to be 20cms
You need two of these. One for the top and one for the bottom.

Interface your fabric if you want it a little structured, or don't if you prefer your bag bag baggy.  I used a lightweight interfacing so it wasnt a cardboard tube but had some shapeliness.

Turn the top and bottom in down oh, I don't know, 1.5 cms ?   and mark a halfway point on the top and bottom and mark a halfway point on your elastic as well.
Pop that sucker in there and pin it down at the halfway point.

now stretch it to about 1cm shy of each end thusly
Realise that this whole time you should have had the camera set to flash and remedy this. 
Go to the sewing machine and zig zag the elastic on, making sure you securely back tack the ends.
It will look like this now.
 French seam it - so wrong sides together first with a 1/4inch seam
Then turn it inside out and sew the seam again.   Make a loop and stitch this on the top.

Stand back and admire
Hang on something a little more aesthetically pleasing and admire more.
This fabric is so cute for these projects don't you think?

lore
x

Wednesday, November 10, 2010

Ok so not officially a Christmas gift - Peg bag tutorial

I had friends moving house and my traditional housewarming gift has lately been a peg bag for their new washing line.

I documented the process this time in case you feel compelled to make one yourself.  So here is the (lite) peg bag tutorial:

You need a bit of fabric and one child's coathanger.

 Make a pattern by drawing the shape of the hanger and then drop down the sides.  Figure out where the pocket should go.   Add half an inch seam allowance all round.   Cut squares in the corners so its got a boxed shape.
Interface the front pieces (back too if you can be bothered).  I didnt have enough of this particular interfacing so not the entire front piece got done, but the main bit that needs to be sturdy is the pocket.
With right sides together draw the pocket on the interfacing.   Sew around with a 1/2 inch allowance.
Turn, clip curves and stay stitch.

Now just sandwich the whole lot together so you have wrong sides together for the back pieces and lay your completed front on top.   Sew the sides and top - leaving about 1.5 inches for the coathanger hook.  Sew the bottom seam.  Box the corners.   Tidy seams up on overlocker and voila.

Add a couple of bags of the best pegs in the entire WORLD.
And you have a pretty great housewarming present.  Or christmas gift ?!

And because I wanted one for myself too, I picked up some op shop fabric.   $2 each for each of these 3 pieces.

And I made myself a pink one.  With the boxed corners reduced in size.
Just watch out when you're clipping those curves!
Lucky this one's for me!
lore
x